
Proper resolution prevents production delays and ensures quality
Low-resolution artwork is the number one cause of avoidable production delays.
Production lead times begin only after all print-ready artwork has been received, pre-flighted and approved. Artwork rejections due to low resolution images, fonts not being supplied or converted to vector can extend the proofing time on jobs delaying the final delivery significantly.
A design may look sharp on a phone or computer screen but still be unsuitable for commercial printing. Before production can begin, every image must contain enough detail to reproduce cleanly at its final printed size.
Submitting properly prepared artwork helps prevent blurry images, pixelated logos, repeated proofing, and delays.
What Resolution Does My Artwork Need?
For printed products, all photographs and raster images should be supplied at:
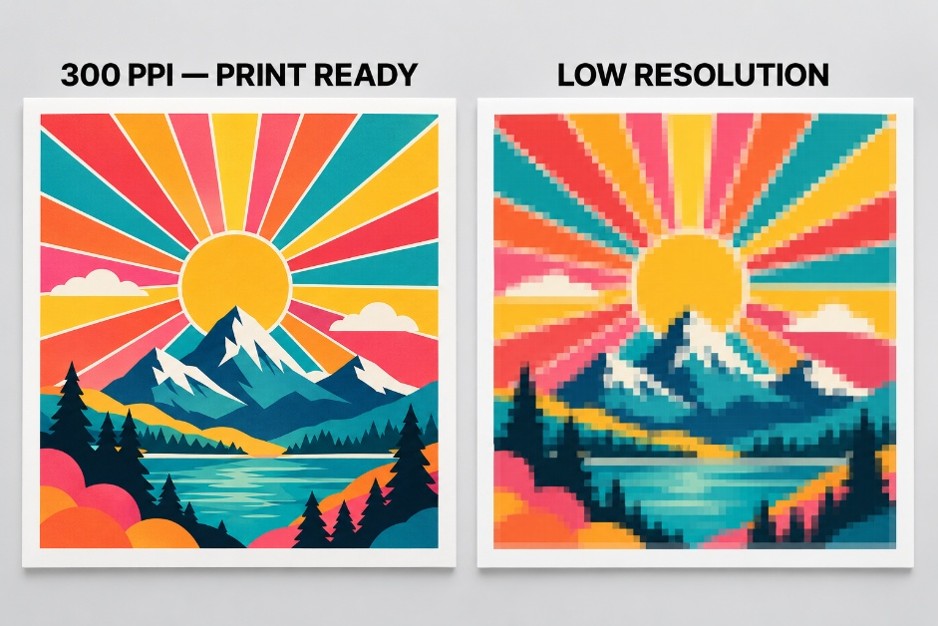
300 pixels per inch (PPI) at the final printed size.
You will often hear this described as “300 DPI.” Technically, PPI refers to the pixels in your digital image, while DPI refers to the dots produced by a printer. In everyday print production, however, the terms are commonly used interchangeably.
The important part is that your image must have enough pixels for the size at which it will be printed.
Quick Resolution Examples
The basic calculation is:
Printed size in inches × 300 PPI = required number of pixels
For example:
5 inches × 300 PPI = 1,500 pixels
A photograph intended to print at 5″ × 5″ should therefore be at least 1,500 × 1,500 pixels.
Changing the DPI Number Does Not Improve the Image
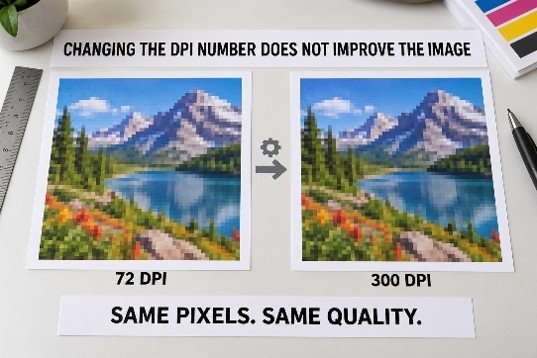
One of the most common mistakes is opening a small image and changing its resolution setting from 72 DPI to 300 DPI.
This does not automatically add real detail.
If the image started with too few pixels, simply changing the DPI number – or resaving it as a PDF – will not make it genuinely high resolution. The file may now say “300 DPI,” but the image can still appear soft or pixelated when printed.
The same applies to enlarging a small JPEG, taking a screenshot or downloading a thumbnail from a website. Once detail is missing, it cannot be fully restored by changing the file settings.
Whenever possible, return to the original photograph, illustration or design file and export it again at the correct dimensions.
Check the Effective Resolution at Final Size
An image can be 300 PPI when it is created and still become low resolution after it is enlarged.
For example, a 5″ × 5″ image at 300 PPI contains 1,500 × 1,500 pixels. If that image is enlarged to 10″ × 10″ without adding genuine detail, its effective resolution drops to 150 PPI.
Always check the resolution after the image has been placed and scaled to its final size in the layout.
Reducing an image is generally safe. Enlarging a raster image reduces its effective resolution.
Vector Artwork Is Best for Logos and Text
Logos, lettering, icons and line art should be supplied as vector artwork whenever possible.
Common vector formats include:
Adobe Illustrator (.ai) • Encapsulated PostScript (.eps) • Scalable Vector Graphics (.svg) • Vector PDF (.pdf)
Vector graphics are built from mathematical shapes rather than pixels, allowing them to be enlarged without becoming blurry. They are especially important for apparel printing, signage, packaging, promotional products and any design requiring colour separation.
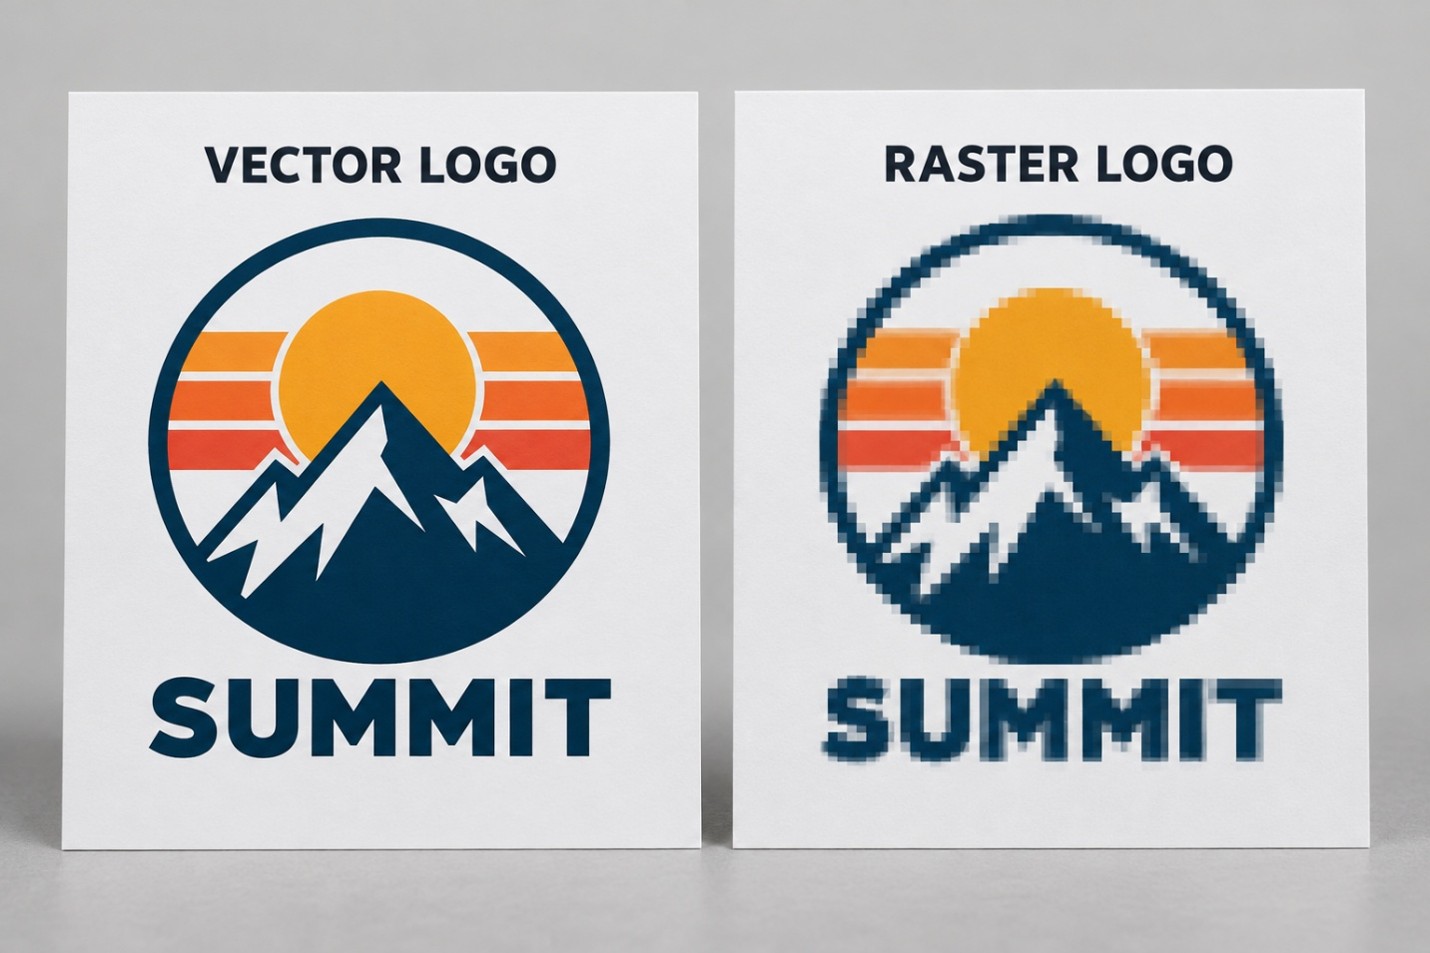
Saving a JPEG or PNG as an AI, EPS or PDF file does not convert it into vector artwork. The graphic remains a raster image unless it has been properly recreated or traced as vectors.
Use the Correct Pressing Media Template
Always build your layout using the current Pressing Media template supplied for your specific product.
Templates identify critical production areas, including:
Bleed • Trim or cut lines • Safety margins • Folds • Spines • Disc hubs • Pockets • Glue areas • Other finishing requirements
Do not resize, crop or alter the template. Even a small dimensional difference can affect trimming, folding, assembly or alignment.
Keep the template on its own locked layer and place your artwork on a separate design layer. Unless instructed otherwise, template guides should not appear in the final printed artwork.
Do not use a template from another manufacturer. Specifications can differ between printing facilities, equipment and packaging styles.
Remember the Bleed and Safety Area
For most printed paper products, extend background colours and images at least 1/8″ beyond the trim line.
This extra artwork is called bleed. It allows for the normal movement that occurs when printed sheets are cut. Without sufficient bleed, thin white edges may appear on the finished product.
Important text, logos, faces and other essential content should remain inside the template’s safety margin. Do not place critical elements directly against a cut line, fold, spine or disc opening.
Always follow the supplied template when its bleed or safety requirements differ.
Prepare Artwork in CMYK
Screens display colour using RGB – red, green and blue light. Commercial printing generally reproduces full-colour artwork using CMYK – cyan, magenta, yellow and black ink.
Artwork designed in RGB may contain bright colours that cannot be reproduced exactly in print. Converting the file to CMYK can cause visible colour changes, particularly with vivid blues, greens, reds and fluorescent-looking colours.
Prepare and review your artwork in the requested CMYK colour space whenever possible. If your project uses Pantone, metallic, fluorescent, white ink or another spot colour, identify each colour clearly and keep it on the appropriate separate layer.
Please remember that an onscreen PDF proof confirms content and positioning. It is not a reliable guarantee of printed colour because monitors display colours differently.
Outline Fonts or Include Them with the Artwork
Missing fonts are another frequent reason files fail preflight.
Before exporting your final print file, convert all text to outlines or curves. This prevents font substitution and ensures the lettering prints as designed.
Keep a separate editable copy containing live text in case revisions are needed later. Once type has been outlined, correcting spelling, dates, song titles or contact information becomes more difficult.
If editable source files are requested, package the document with all permitted fonts and linked images.
Canva Artwork Still Requires a Resolution Check
Canva can produce usable print files, but exporting a design as “PDF Print” does not automatically improve low-resolution images placed inside the layout.
Before exporting from Canva:
- Start with a document at the correct final dimensions.
- Use the highest-resolution original images available.
- Avoid screenshots and images copied from websites or social media.
- Do not enlarge small images beyond their original size.
- Extend backgrounds fully into the bleed area.
- Download the finished design using the PDF Print option.
- Include bleed only when it matches the Pressing Media template and instructions.
If you are uncertain, send us the exported PDF before placing your order so the artwork can be reviewed.
Complete Every Component in Your Package
Projects are also delayed when artwork is missing for one part of the order.
Depending on the product, separate artwork may be required for:
- Front and back covers
- Interior panels
- Spines
- Booklet pages
- Disc faces
- Vinyl Side A and Side B labels
- Inner sleeves
- Inserts
- Stickers
- Posters
- Download cards
- Belly bands or wraps
- Packaging bottoms, lids or pockets
Compare your files with the full list of components included in your quote or order form before uploading them.
Final Artwork Checklist
Before submitting your files, confirm that:
- The correct Pressing Media template was used.
- The template dimensions were not changed.
- Raster images are 300 PPI at their final printed size.
- Logos and line art are supplied as vectors whenever possible.
- Artwork extends through the required bleed.
- Important content remains inside the safety area.
- Colours are prepared in CMYK or as specified spot colours.
- Fonts are outlined or properly packaged.
- All linked images are embedded or included.
- Every component in the order has corresponding artwork.
- Spelling, dates, track listings, contact details and barcodes have been checked.
- The final PDF was reviewed at high magnification before upload.
Check Your Artwork Before Production
Our prepress team reviews submitted files for common technical issues, but preflight does not replace proofreading or professional graphic design. Low-resolution images, missing elements and incorrect layouts may require revised files before production can begin.
Taking a few extra minutes to verify resolution and template placement can prevent days of unnecessary back-and-forth.
NEED AN EXPERT OPINION?
If you are unsure whether your artwork is ready, contact Pressing Media before submitting the final files. Our team can review your project requirements, supply the correct templates and provide graphic-design assistance when needed.
We also have a great design team that can help with affordable solutions.
Ready to submit your artwork?
Contact Pressing Media at 1-800-511-8171 or info@pressing-media.com for the correct templates and artwork specifications for your project.
Pressing Media believes in the healing power of music. Seven percent of the profit from every order is donated to Music Heals Charitable Foundation.